


What is a Cable Railing System?
Are you looking for a railing system that is safe, stylish, and durable? Do you want to enjoy the beauty of your surroundings without any obstruction? If so, you might want to consider a cable railing system. A cable railing system is a type of railing that uses horizontal or vertical cables instead of traditional balusters or spindles. In this blog post, we will explain what a cable railing system is, what are its components, benefits, and installation methods, and how you can get one for your home or business.

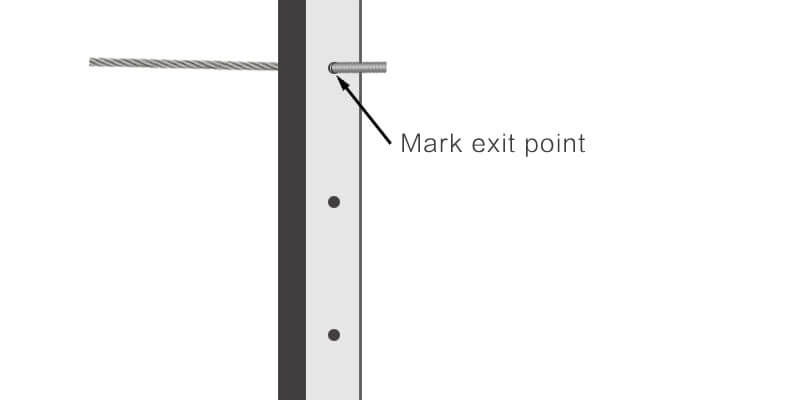
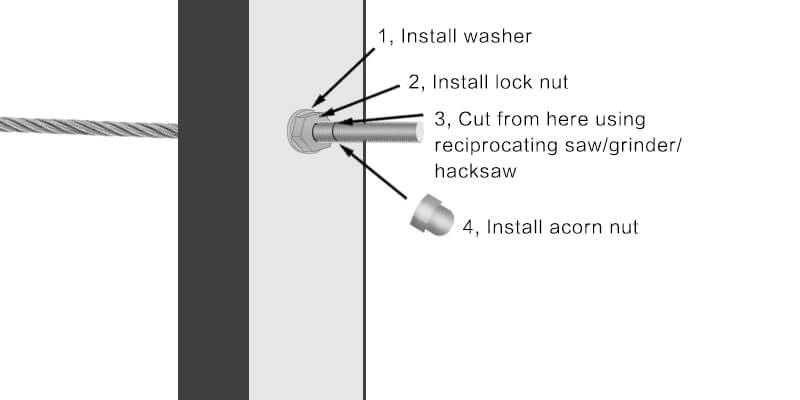
How to Install Cable Railing Kits on Your Deck or Stair in 5 Easy Steps
How to Install Cable Railing Kits on Your Deck or Stair in 5 Easy Steps Cable railing kits are a great way to add a

What You Need to Know Before Buying Cable Railing Kits Online
What You Need to Know Before Buying Cable Railing Kits Online Cable railing kits are a popular choice for homeowners who want to add a

How to Keep Your Cable Railing Tight: A Guide for Homeowners
How to Keep Your Cable Railing Tight: A Guide for Homeowners Cable railings are a popular choice for decks, balconies, and stairways because of their

How to Maintain Cable Railings
How to Maintain Cable Railings Maintaining your cable railing is an important aspect of keeping your property safe and attractive. Cable railings are a popular

Are cable rails worth it?
Are cable rails worth it?"); display: inline-block; height: 24px; width: 24px; margin-top: -1px; color: rgb(32, 33, 36); font-family: arial, sans-serif; font-size: medium; font-weight: 400; text-align: